Nx Editor Plugins
Spend less time looking up command line arguments and more time shipping incredible products.
With Nx, you can get a full-stack application up and running in minutes, no need to figure out sourcemaps, webpack or test runners. It all works out of the box. Nx also helps you to enforce consistent development practices by generating components, services, and state management modules.
Why use Nx Editor Plugins?
Developers use both command-line tools and user interfaces. They commit in the terminal, but resolve conflicts in VSCode or WebStorm. They use the right tool for the job.
Nx is a command-line tool, which works great when you want to serve an application or generate a simple component. But it falls short once you start doing advanced things.
For instance:
- Exploring custom generator collections is hard in the terminal, but it's easy using Nx Console.
- Using rarely-used flags is challenging. Do you pass absolute or relative paths? You don't have to remember any flags, names or paths - Nx Console will help you by providing autocompletion and validating your inputs.
- Finding the right Nx extension can take a long time. When using Nx Console, you can find and install an extension in minutes.
Nx Console does all that and more!
Download
VSCode
If you are using VSCode, you can install the Nx Console VSCode Plugin from Marketplace. The Nx Console VSCode Plugin is built and maintained by the Nx team.
WebStorm
If you are using WebStorm, you can install one of the available plugins: nx-webstorm Nx Console Idea
These plugins are NOT built or maintained by the Nx team. They are maintained by independent community contributors.
Nx Console for VSCode
![]()
True UI for Nx
Nx Console is the UI for Nx. It works for any generator or any architect commands. Nx Console does not have a specific UI for, say, generating a component. Instead, Nx Console does what the command-line version of Nx does - it analyzes the same meta information to create the needed UI. This means that anything you can do with Nx, you can do with Nx Console. After all, Nx Console is the UI for Nx.
Useful for both experts and beginners
Even though we started building Nx Console as a tool for experts, we also aimed to make Nx Console a great tool for developers who are new to development or Nx. You can create projects, interact with your editor, run generators and commands and install extensions without ever touching the terminal or having to install any node packages globally. Also, Nx Console highlights the properties you are likely to use for built-in generators and commands, so if you haven't used the CLI, you don't get overwhelmed.
Documentation
Generate
The Generate action allows you to choose a generator and then opens a form listing out all the options for that generator. As you make changes to the form, the generator is executed in --dry-run mode in a terminal so you can preview the results of running the generator in real time.
From the Command Palette
You can also launch the Generate action from the Command Palette (⇧⌘P) by selecting nx: generate (ui).
You can even construct the generator options while staying entirely within the Command Palette. Use ⇧⌘P to open the Command Palette, then select nx: generate. After choosing a generator, select any of the listed options to modify the generator command. When you're satisfied with the constructed command, choose the Execute command at the top of the list.
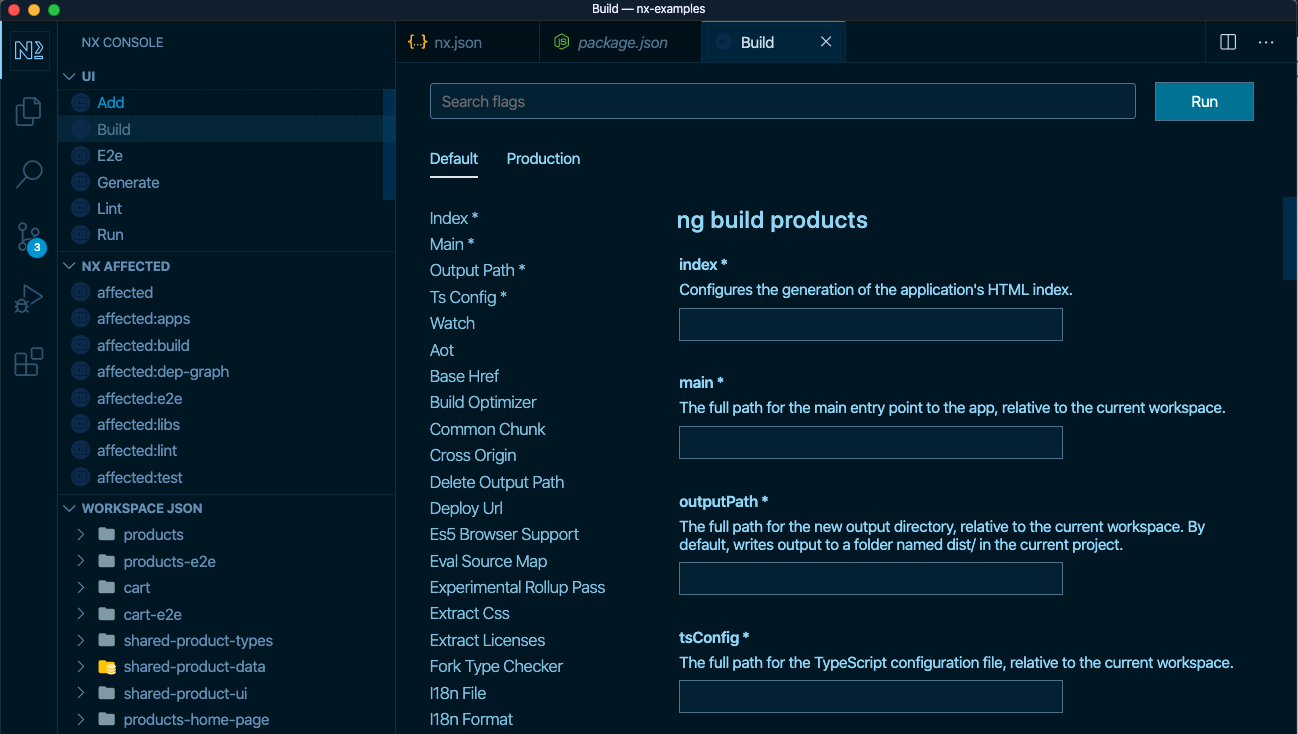
Run
The Run action allows you to choose an executor command and then opens a form listing out all the options for that executor. The frequently used executor commands build, serve, test, e2e and lint also have their own dedicated actions.
From the Command Palette
You can also construct the executor command options while staying entirely within the Command Palette. Use ⇧⌘P to open the Command Palette, then select nx: test. After choosing a project, select any of the listed options to modify the executor command options. When you're satisfied with the constructed command, choose the Execute command at the top of the list.
Common Nx Commands
You can also launch other common Nx commands with the options listed out in the Command Palette.
Projects
Clicking on the name of any project navigates to that project's definition in the workspace.json (or angular.json) file. Clicking on the name of any executor command navigates to that executor command's definition in the workspace.json (or angular.json) file.
Clicking the  icon next to the
 PROJECTS header repopulates the Projects pane from the workspace.json (or angular.json) file.
Clicking the  icon next to a project reveals that project's folder in the VSCode Explorer pane.
Clicking the  icon next to an executor command executes that command without prompting for options.
Streamlining
If you find yourself running the same command many times, here are few tips to save yourself some key strokes.
Rerun Last Task
If you want to rerun the last task with all the same options specified, bring up the Command Palette (⇧⌘P) and choose Rerun Last Task.
Keyboard Shortcuts
You can also set up custom tasks and assign keyboard shortcuts to them. In .vscode/tasks.json add a task like this:
1{
2  "label": "Test Affected",
3  "type": "shell",
4  "command": "nx affected --target=test"
5}
Then from the Command Palette (⇧⌘P) choose Preferences: Open Keyboard Shortcuts (JSON). Then add the following shortcut:
1{
2  "key": "ctrl+cmd+t",
3  "command": "workbench.action.tasks.runTask",
4  "args": "Test Affected"
5}
Now, pressing ^⌘T will run nx affected --target=test.
Here is more information on VSCode tasks and keyboard shortcuts.